How to Highlight Privately on Glasp
Since its inception, public highlights have been in Glasp's DNA. In pursuit of our mission to democratize access to the learning and experiences that people have accumulated throughout their lives, serving as a utilitarian legacy, we have made these insights visible to everyone.
However, we understand the importance of highlighting privately, especially for confidential information, non-family safe content, etc. So, we released the private version of the highlights. In this tutorial, we introduce how to update the setting and start highlighting in private space.
If you haven't signed up for Glasp or installed the Glasp browser extension, please do so. You can refer to this tutorial.
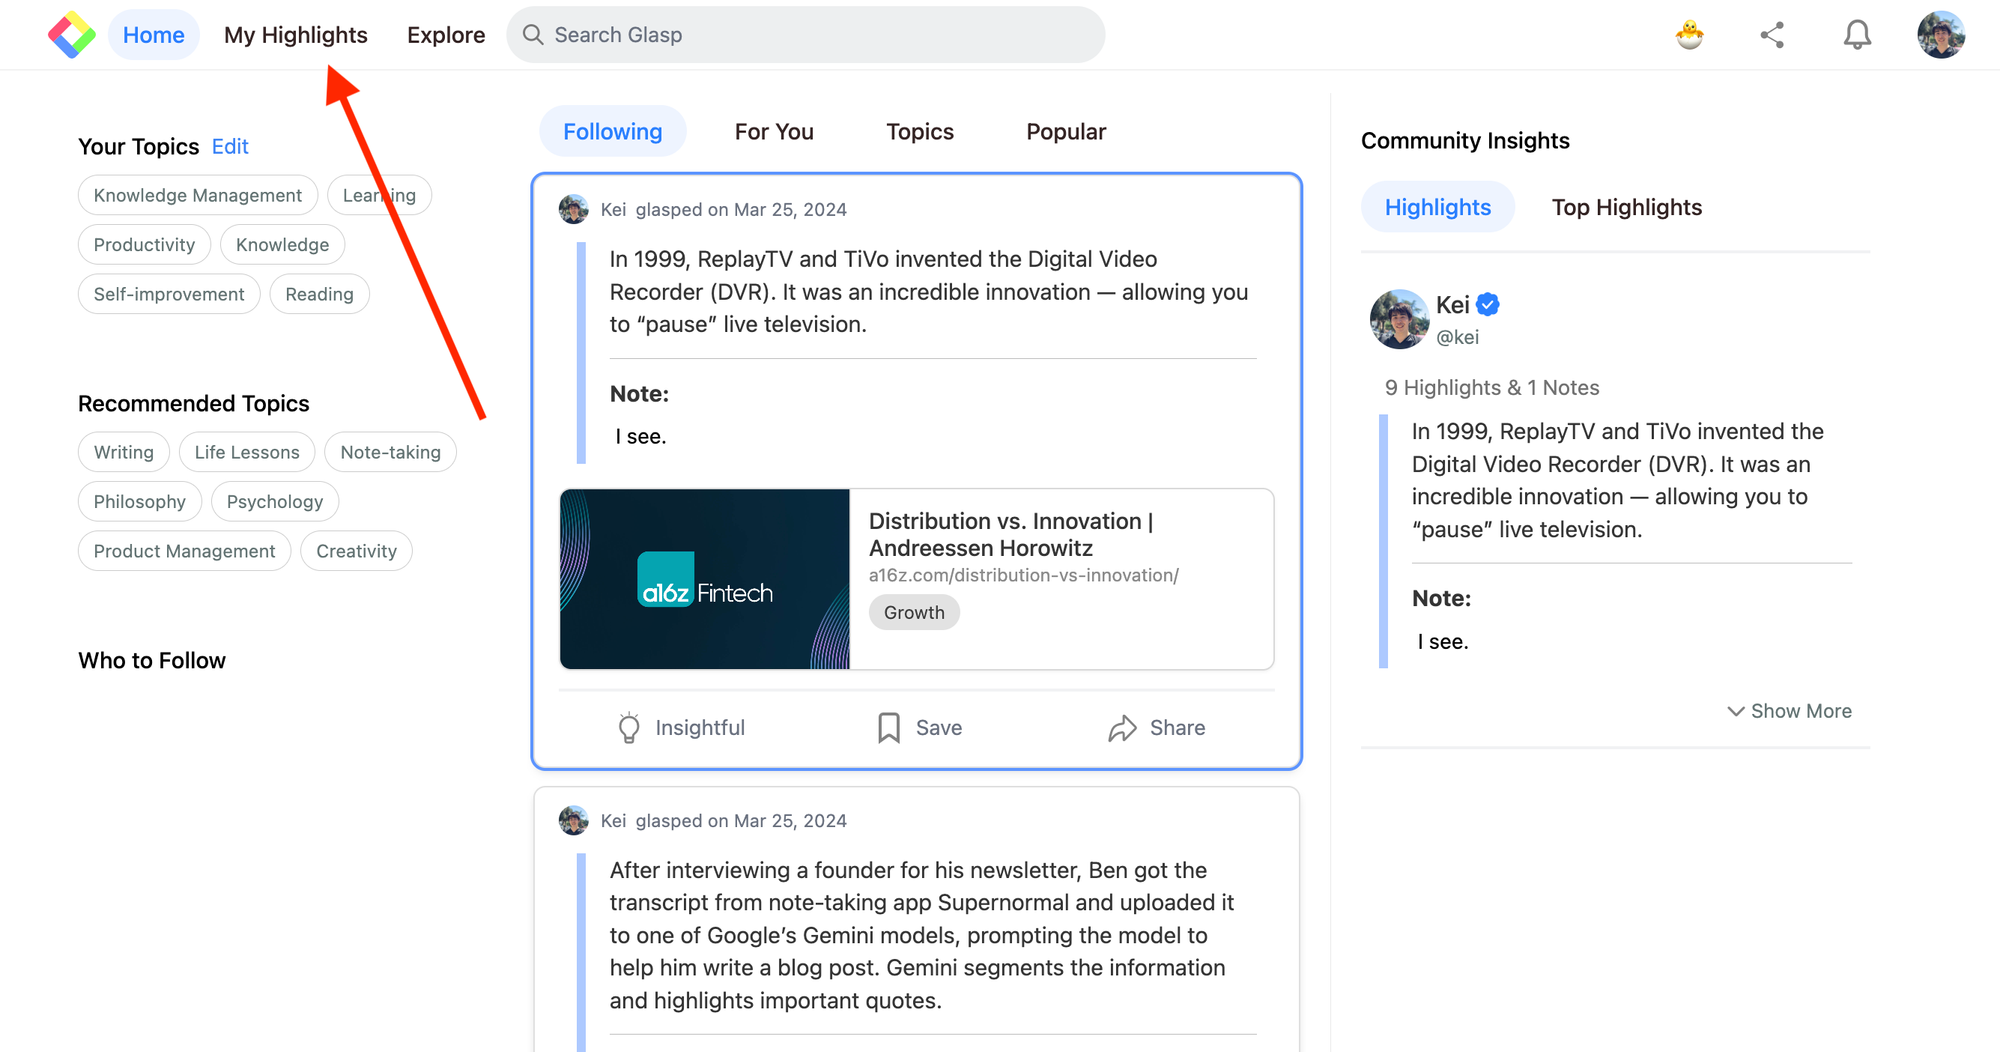
Step 1: Go to "My Highlights" page
If you're on Glasp, please click My Highlight at the top left. It takes you to your profile page.
Then, you can find the Public icon at the top of the My Highlights page.
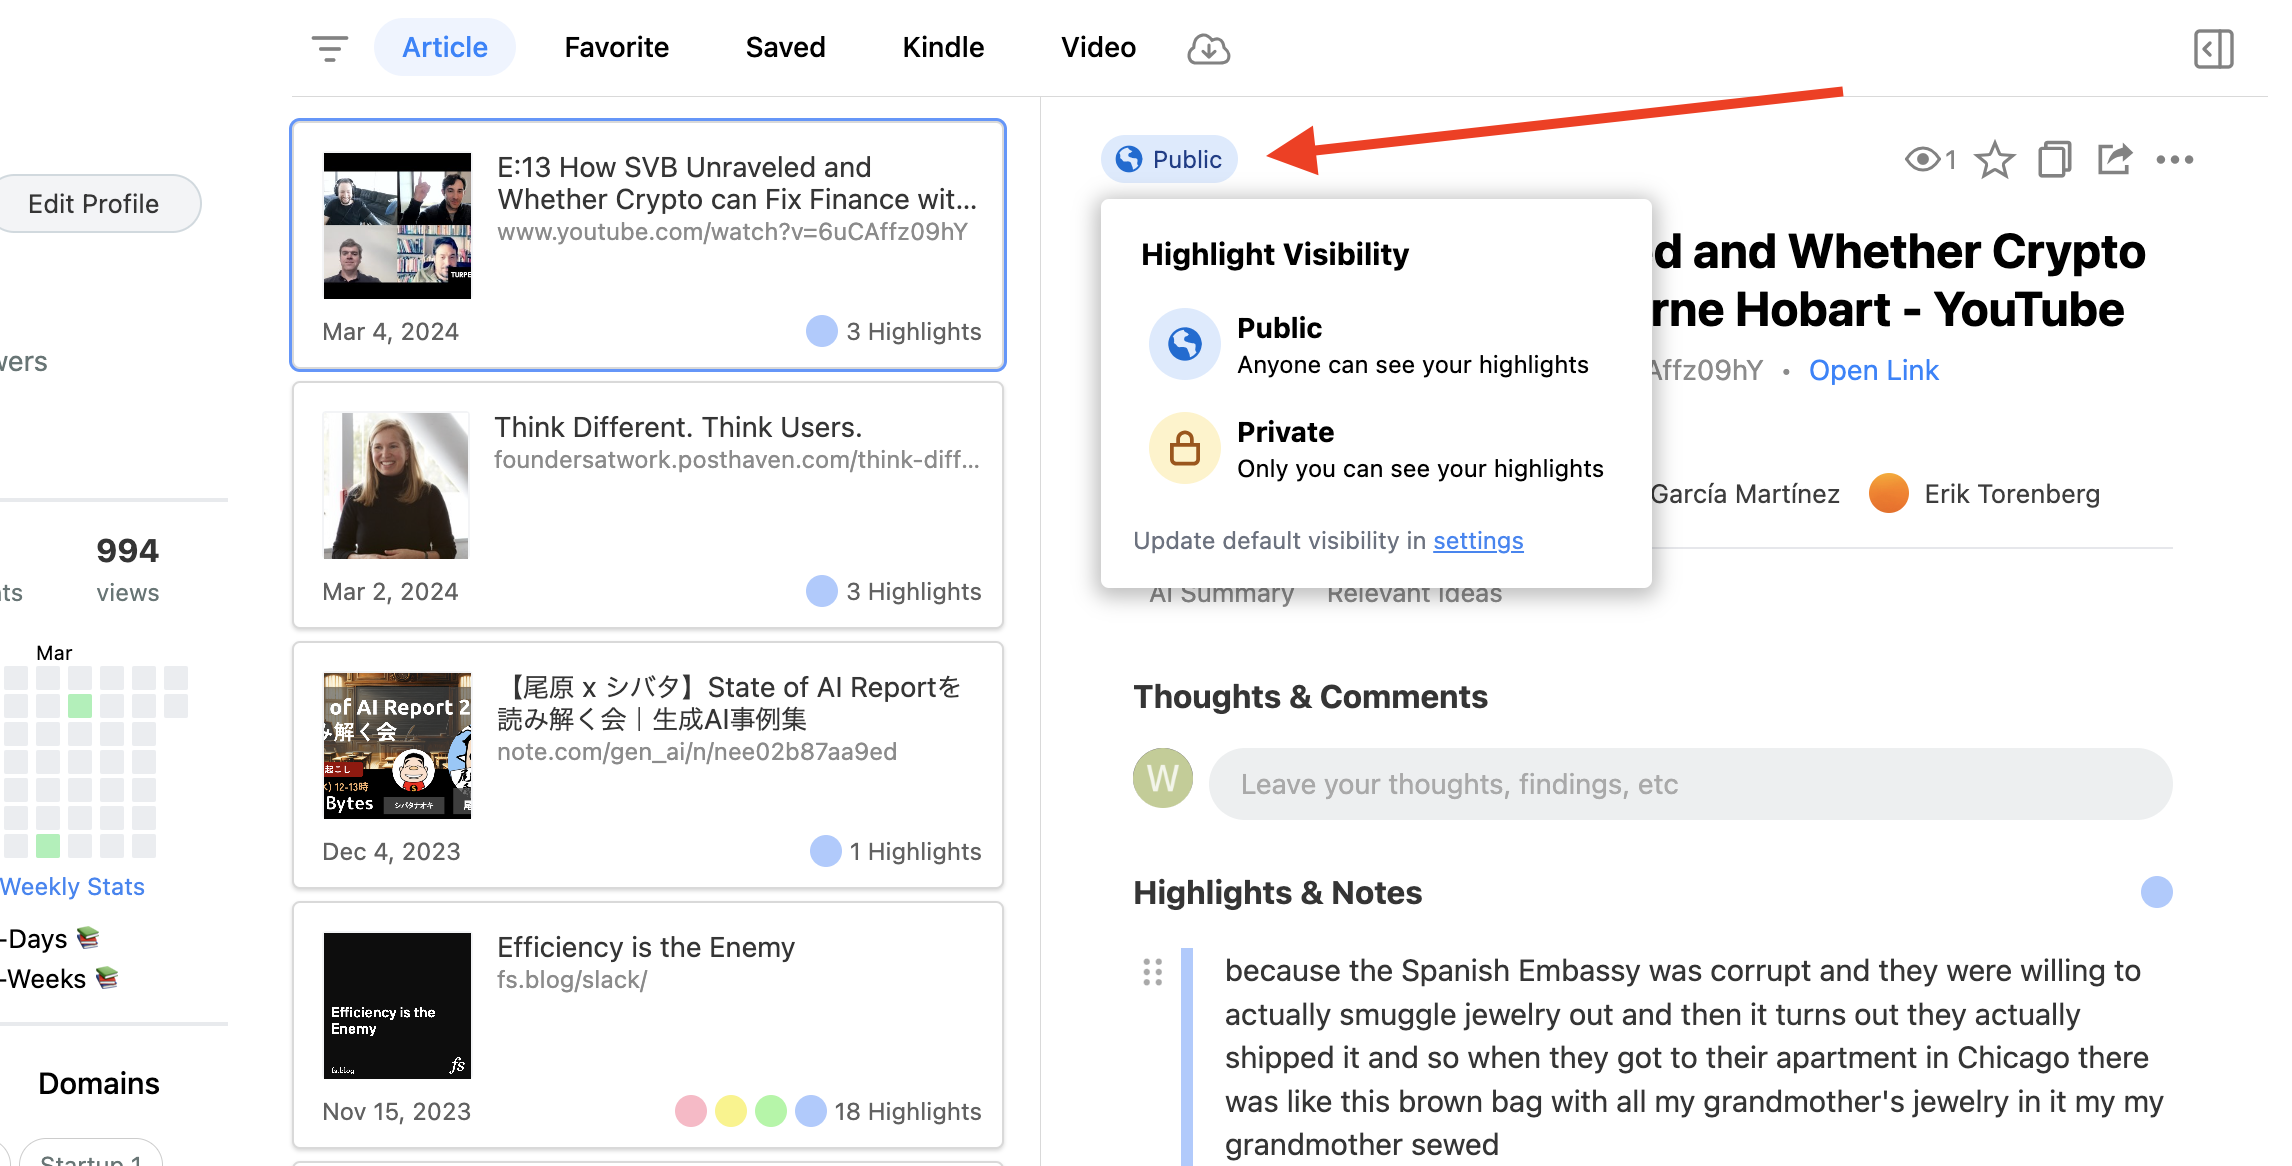
Click Private on the modal. If you're subscribing to a premium plan, you can change the settings to Private. In this status, the highlights, articles, comments, and notes are not visible to anyone except yourself.
If you're not currently subscribed to a premium plan, please consider upgrading to access the private highlight feature, which is now exclusively available to subscribers.
(Optional) Step 2: Update the default setting
If you'd like to highlight web content always privately, please update the default setting. To do that, please click the Public/Private icon on the My Highlights page. Then, click the text button written settings on the modal. It opens the Setting page.
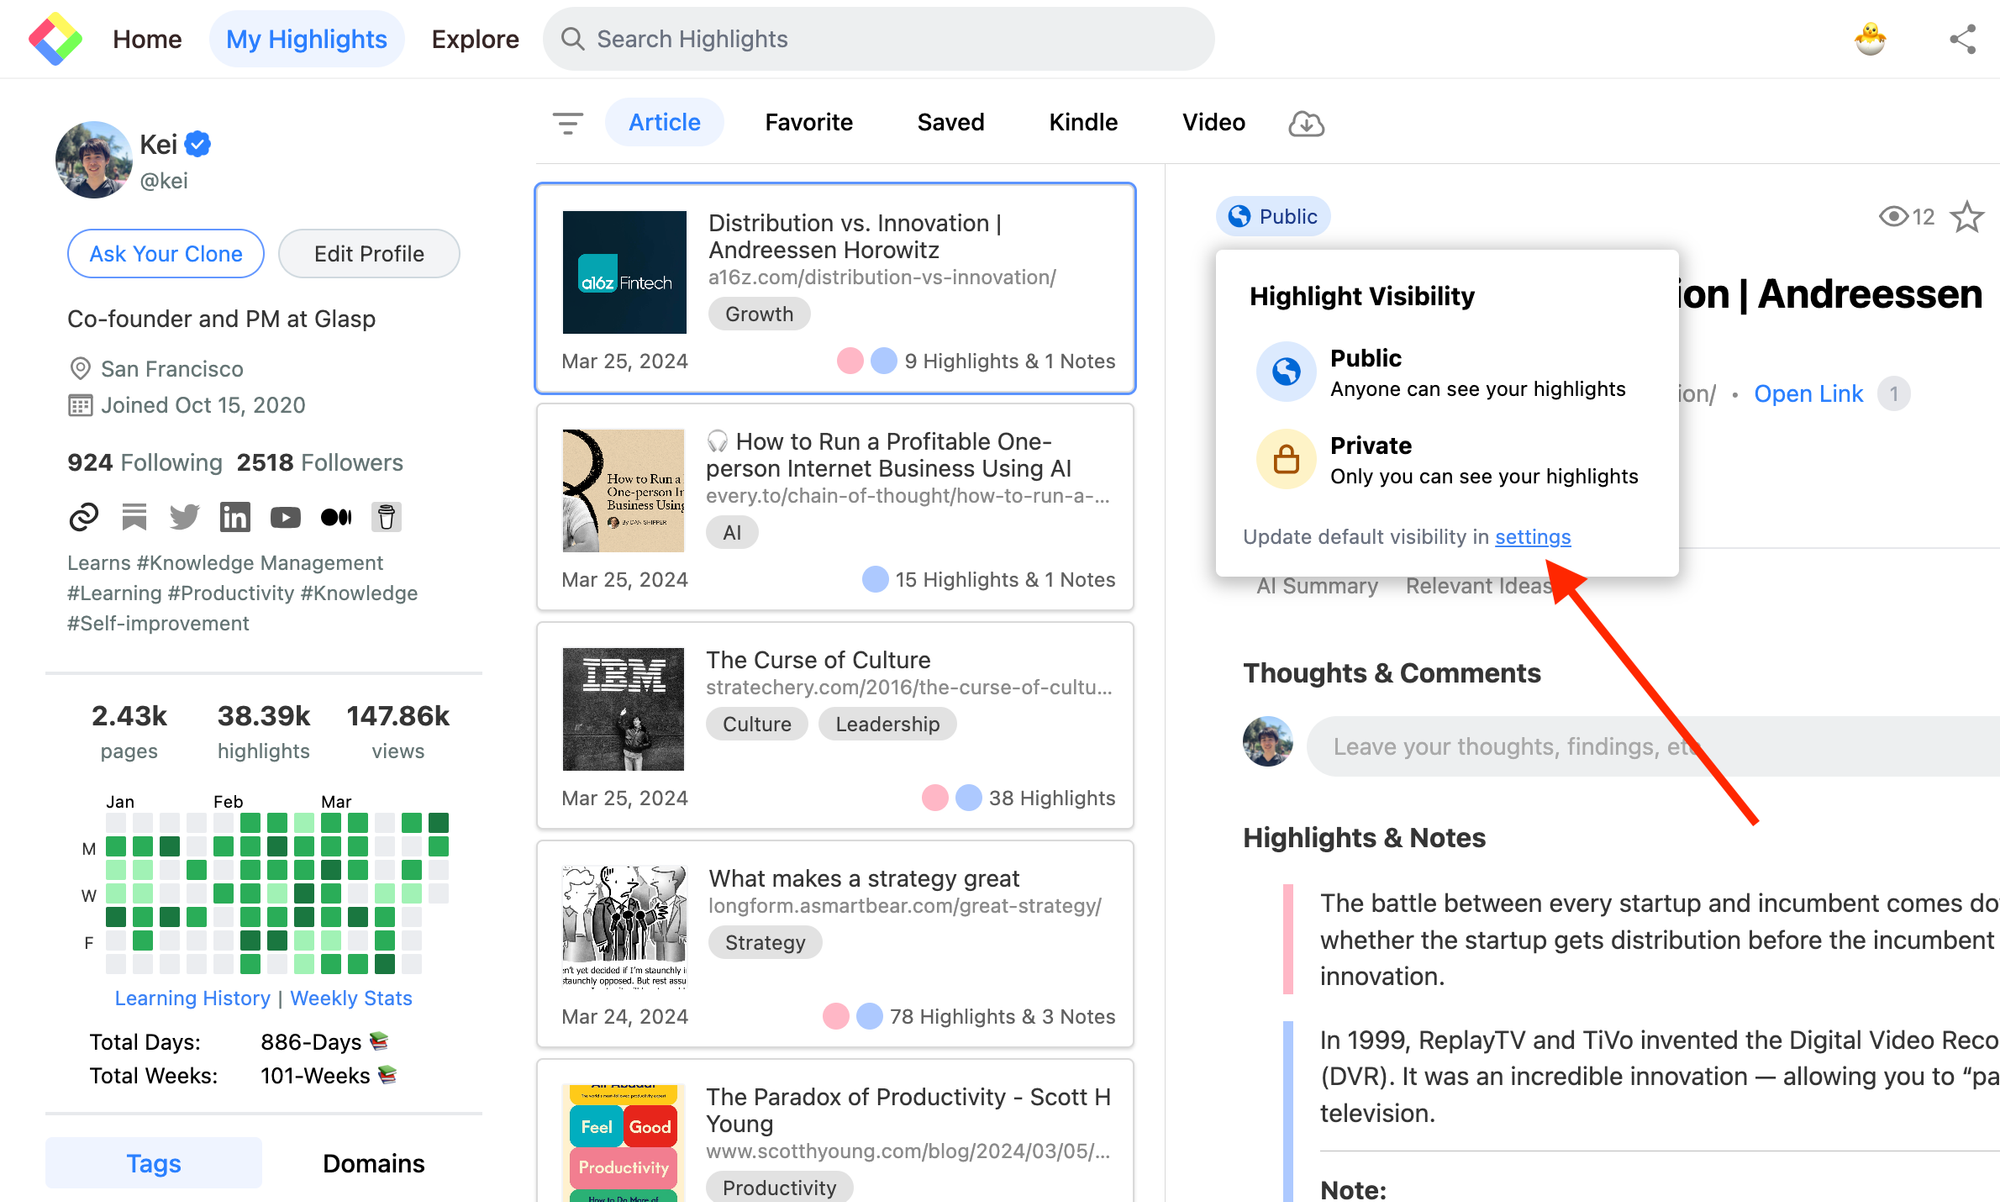
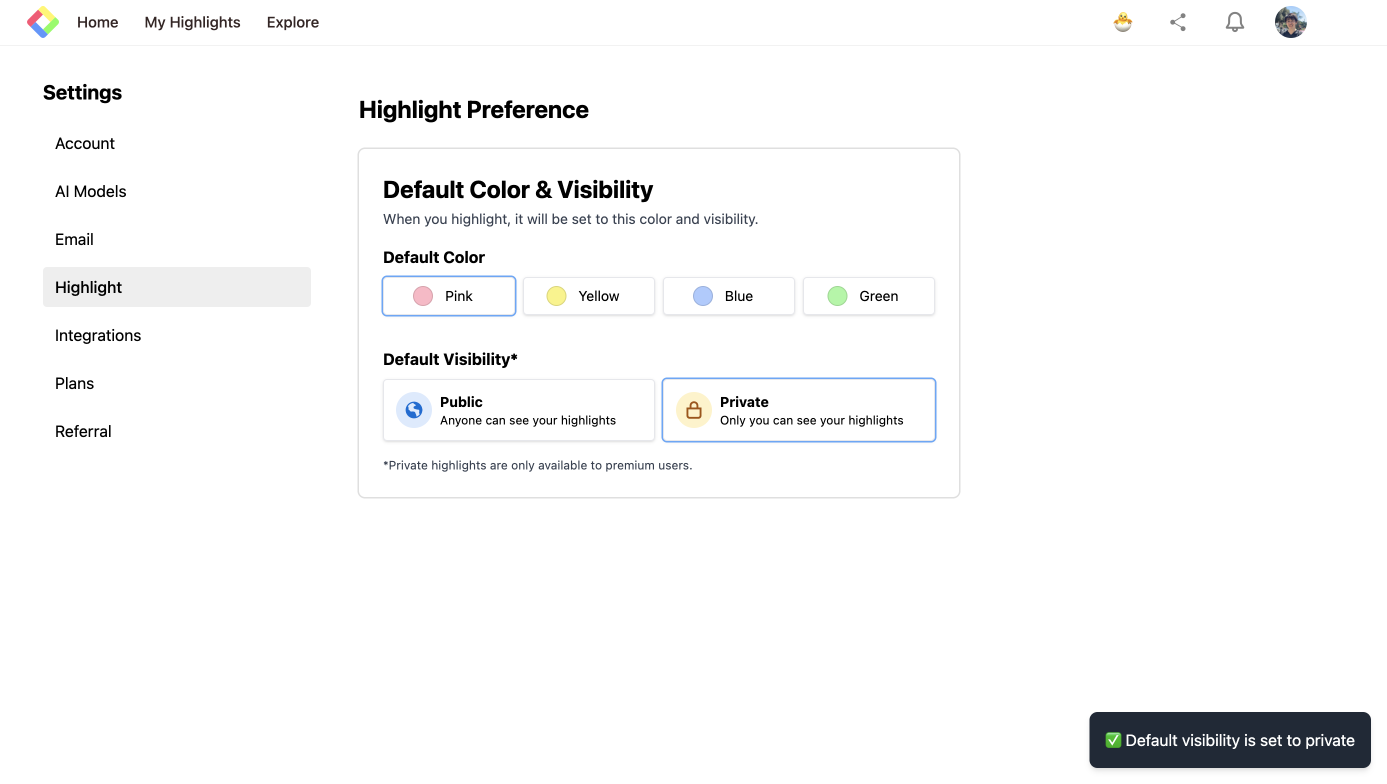
On the Setting screen, you can see Default Visibility. So, click Private to change it. If you can see "Default visibility is set to private" at the top right, you can successfully update the setting.
Before you leave
If you have any questions, please look at the FAQ or message us.
👉 FAQs
👉 Slack
See you next time,
Glasp team
—
