How to Highlight Images with Glasp
We added a new feature to let users highlight and save images with Glasp. Not only text sentences but also graphics, Glasp supports your learning.
If you haven't signed up for Glasp or installed the Glasp browser extension, please do so. You can refer to this tutorial.
Step 1: Open an Article that Contains an Image
Make sure that you logged in to the Glasp account on the Chrome extension. Open any article you want to save an image. We use Glasp's page as an example.
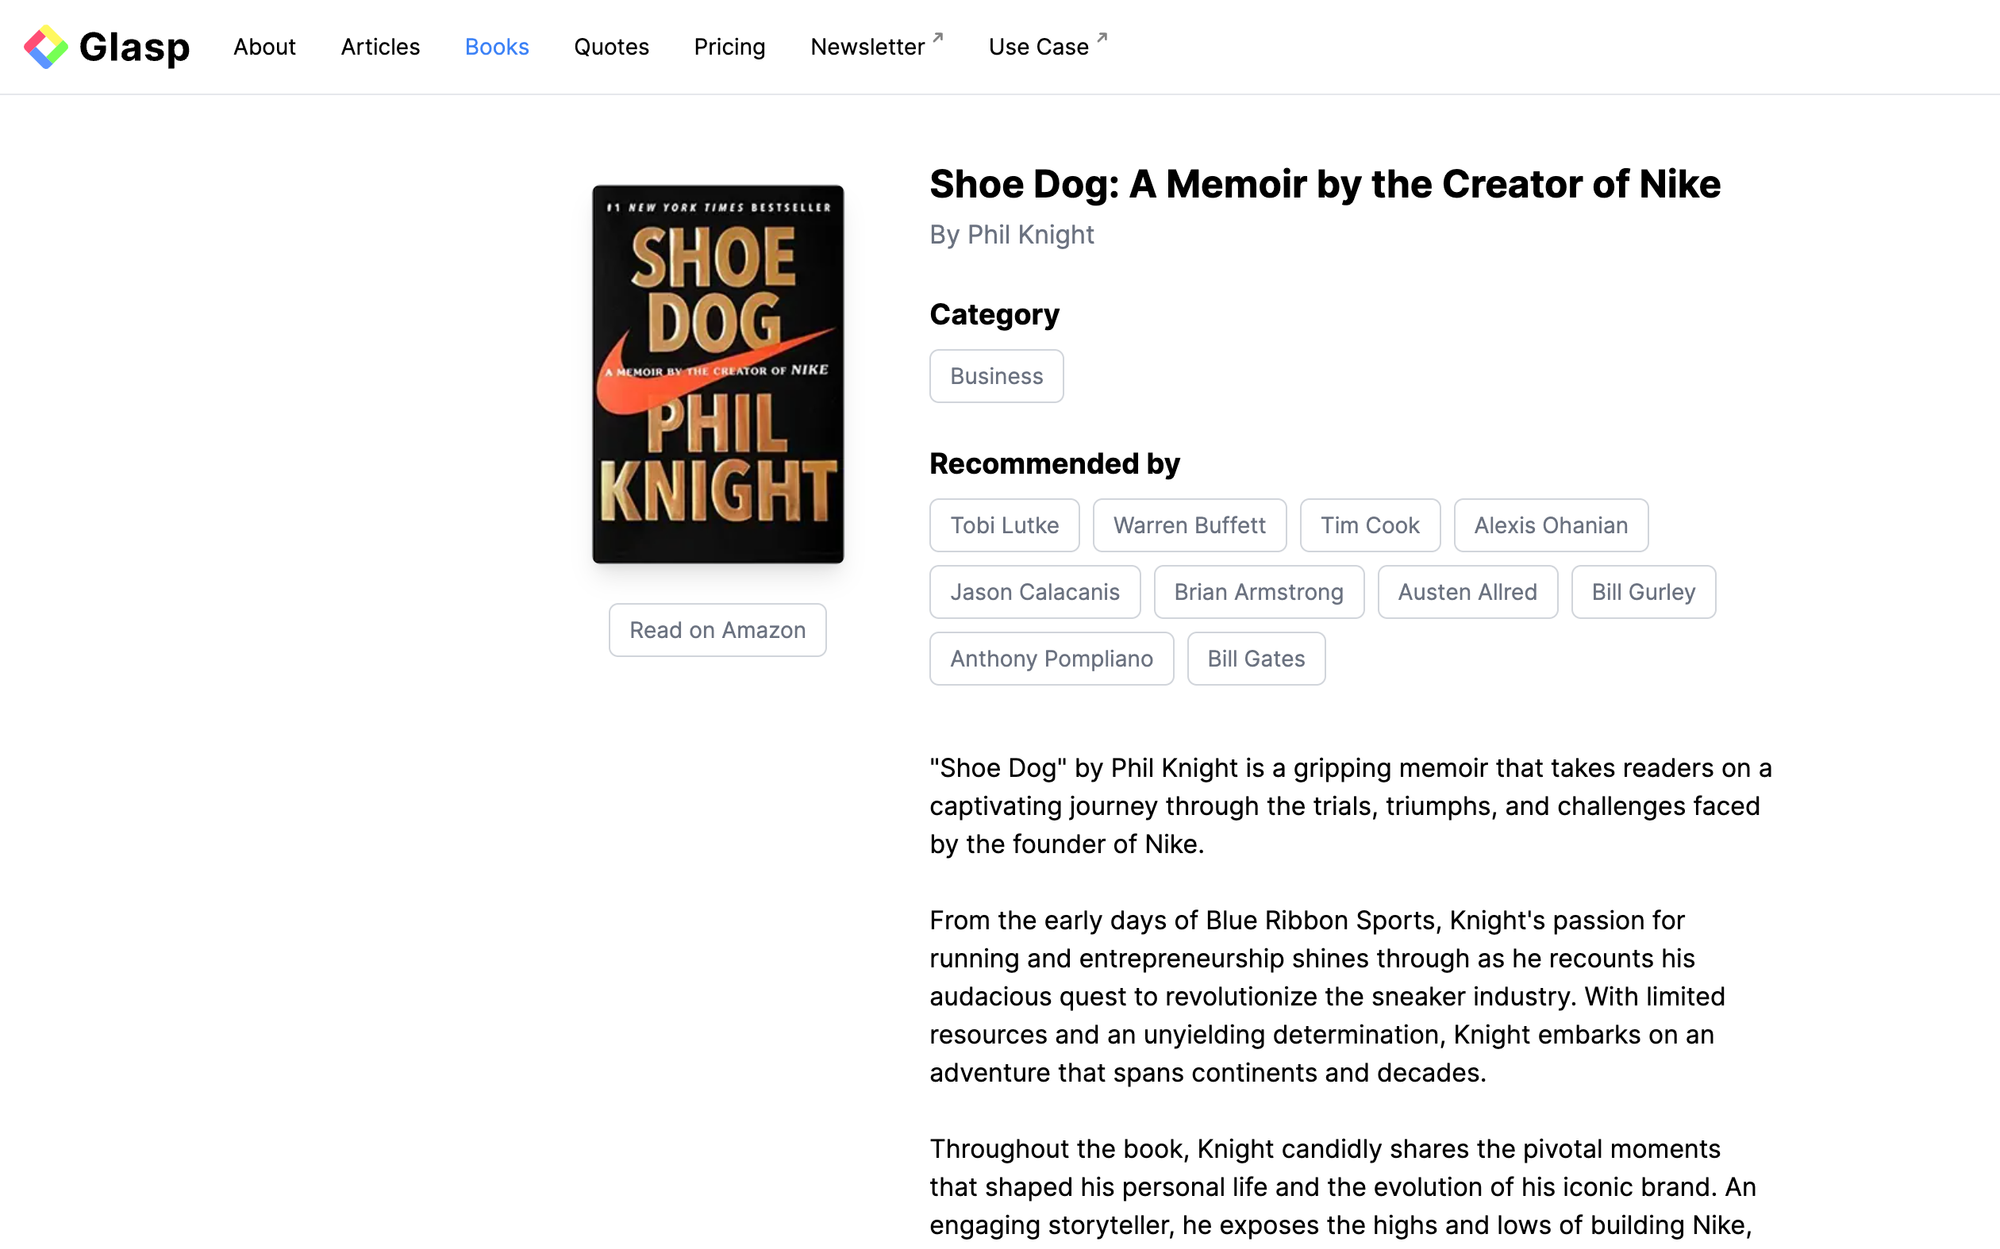
Mouse over the image and right-click it. It shows an option, Highlight Image, so click it to save the image.
Note: Glasp is a social web highlighter, so the image is saved publicly in Glasp and is visible to anyone. If you'd like to save it privately, visit this page and upgrade the plan.
Note: You can save images on social media such as Twitter, LinkedIn, and Facebook.
Step 2: View the Saved Images
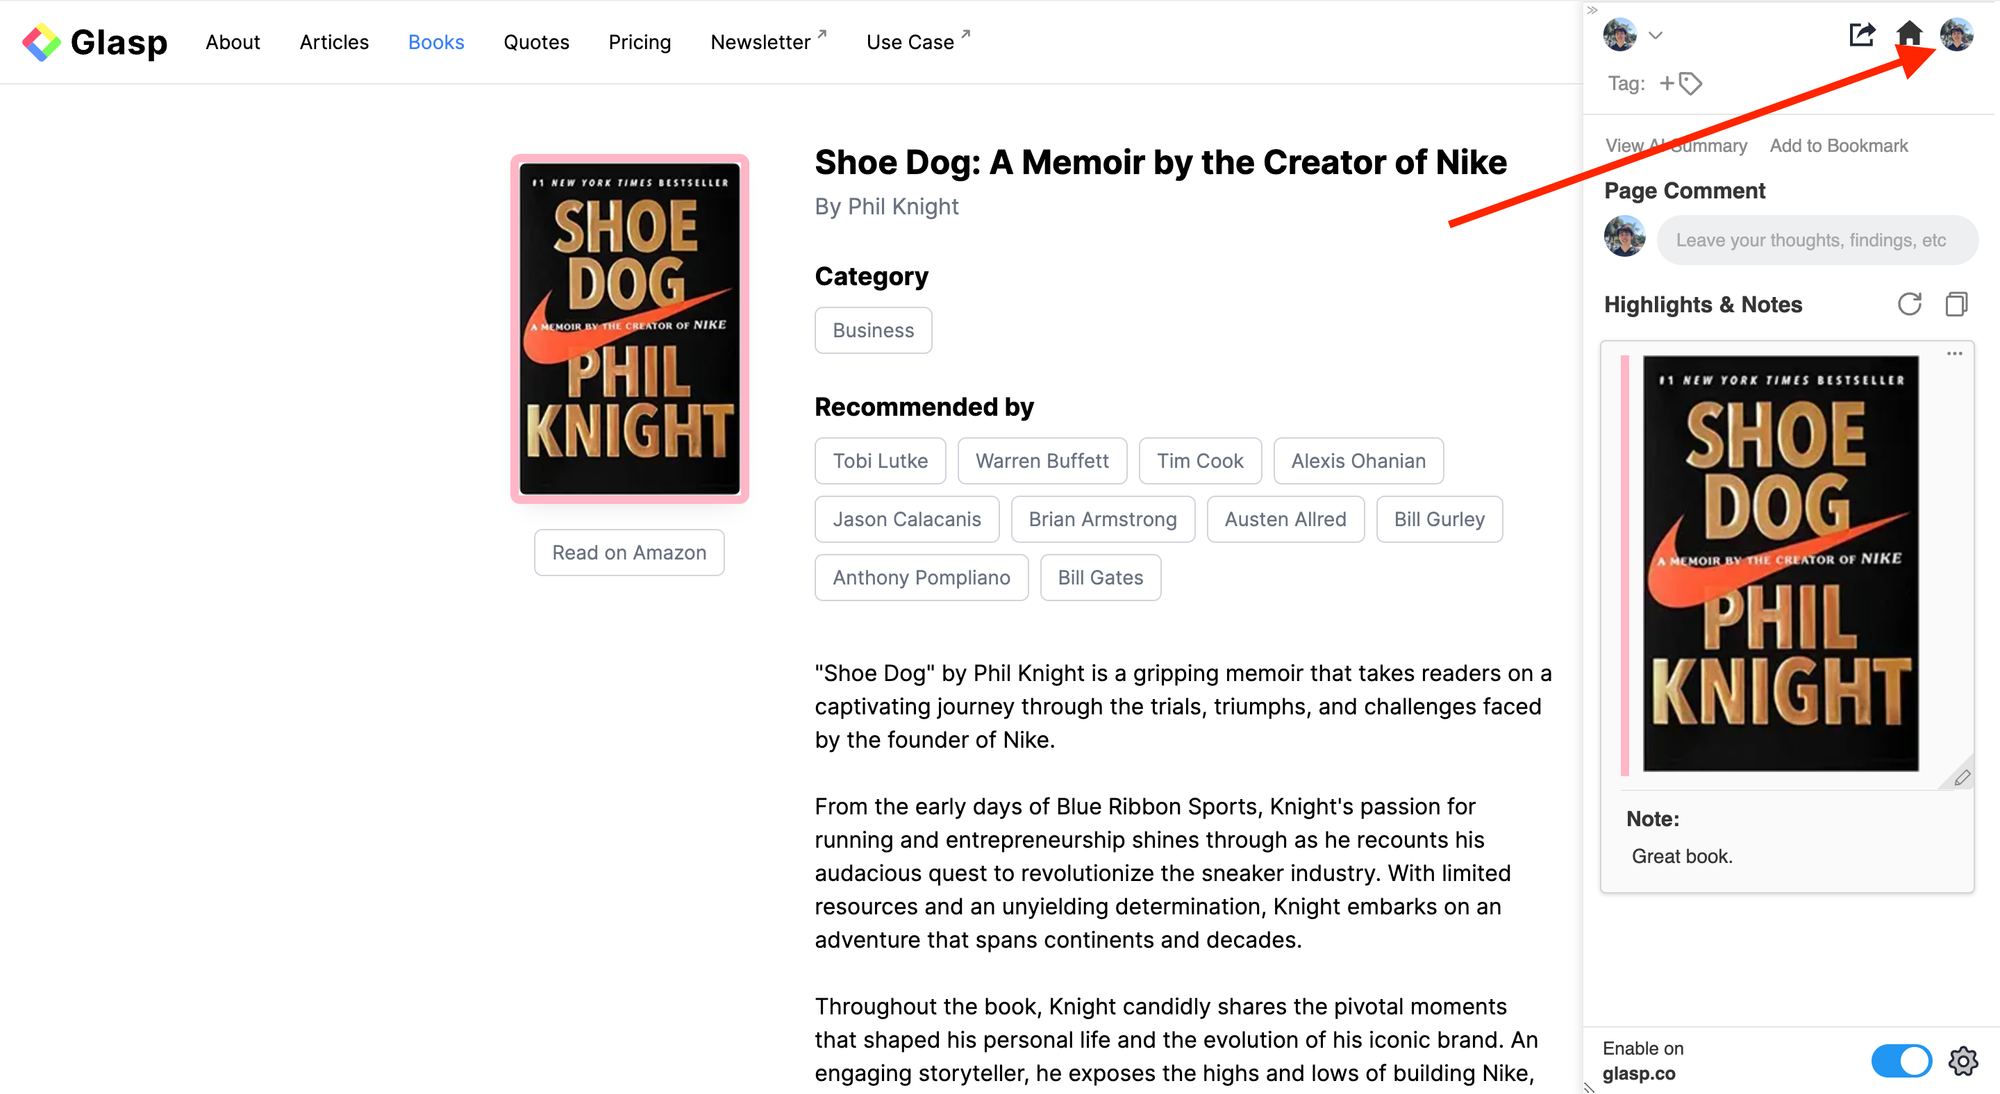
Once you save the image, you can see it on the Chrome extension and the My Highlights page. To see the image on the Chrome extension, click the Glasp icon on the toolbar and open the sidebar.
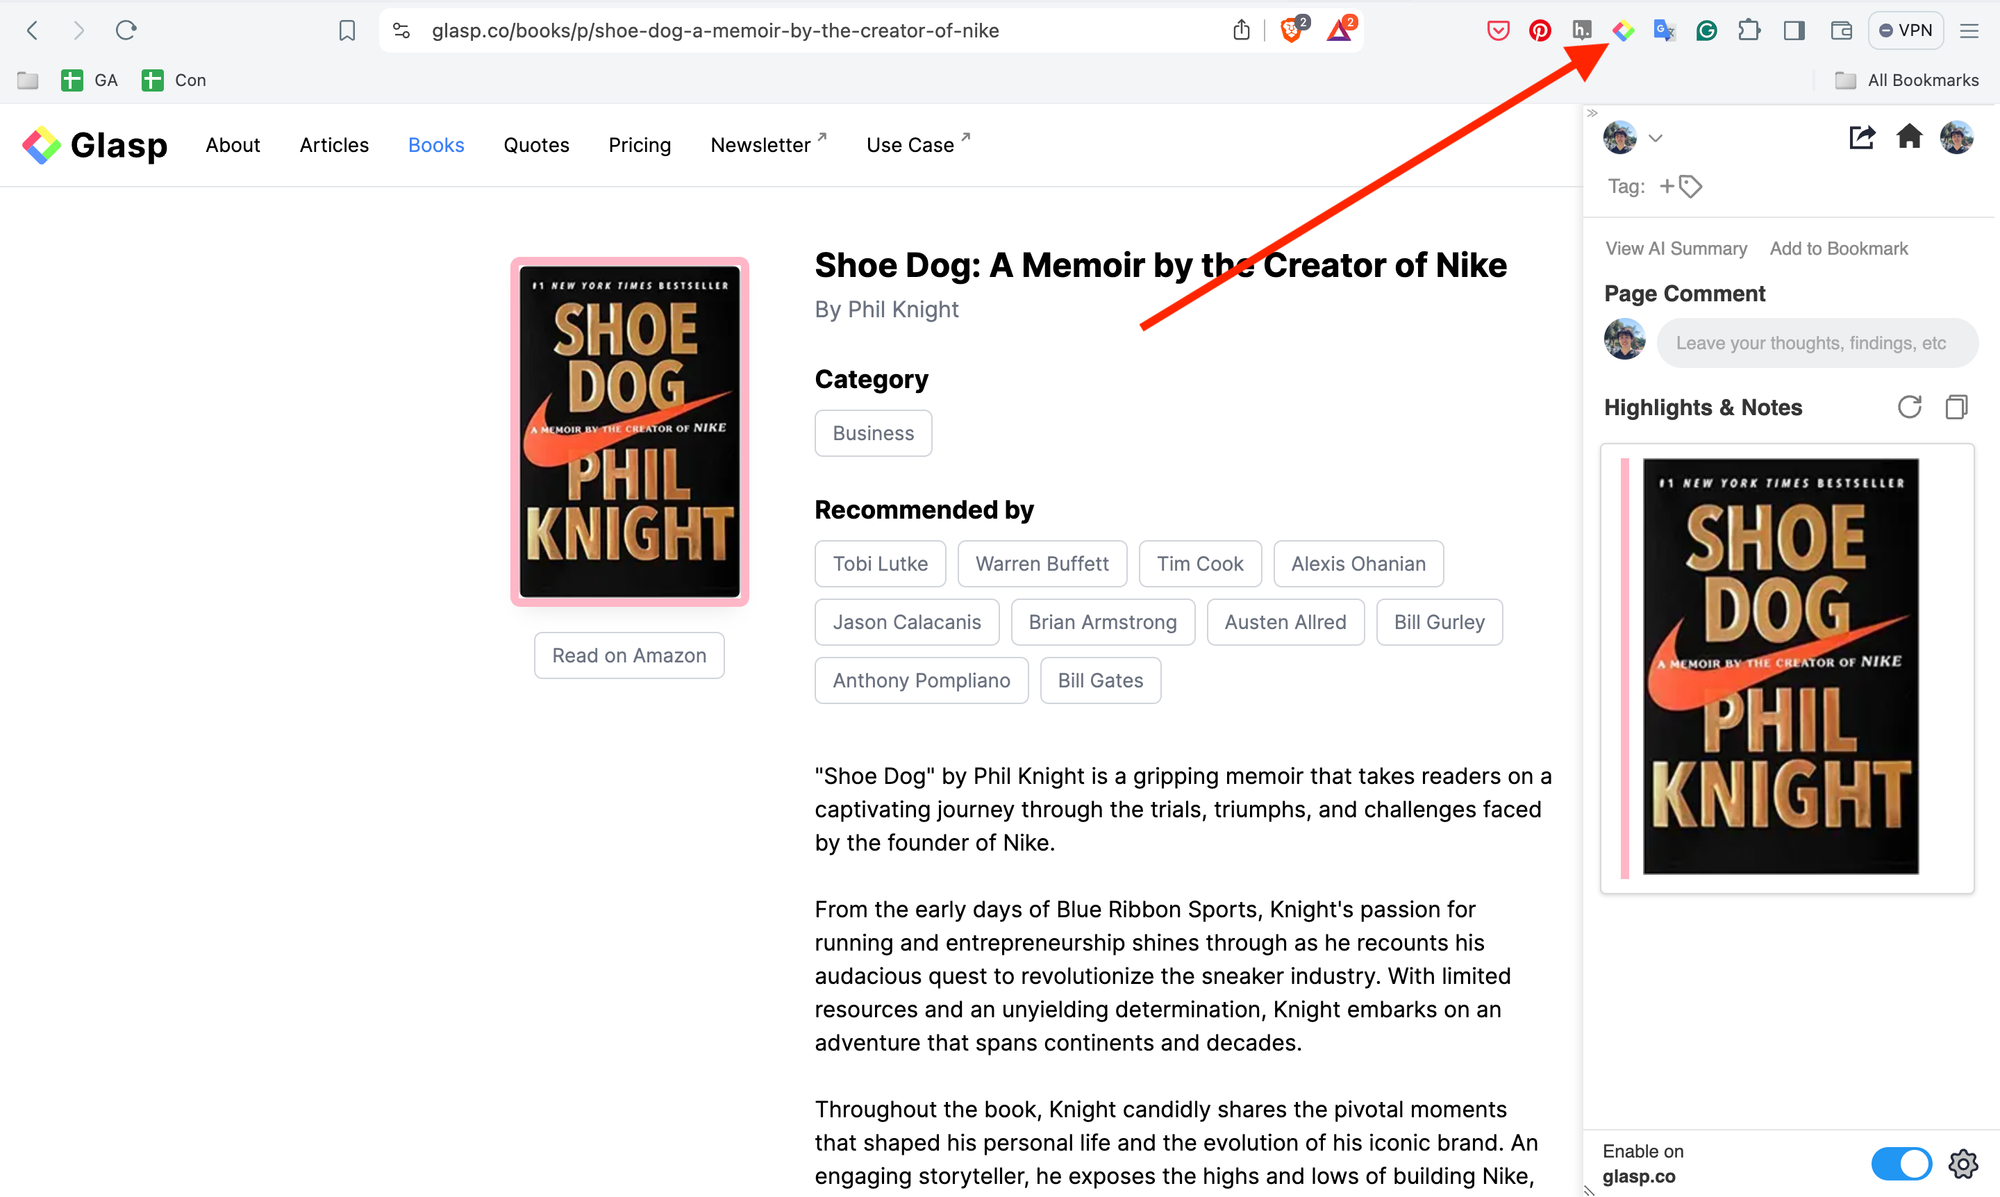
You can take notes on the image if you want. Click the pencil icon at the bottom right and open a note space.
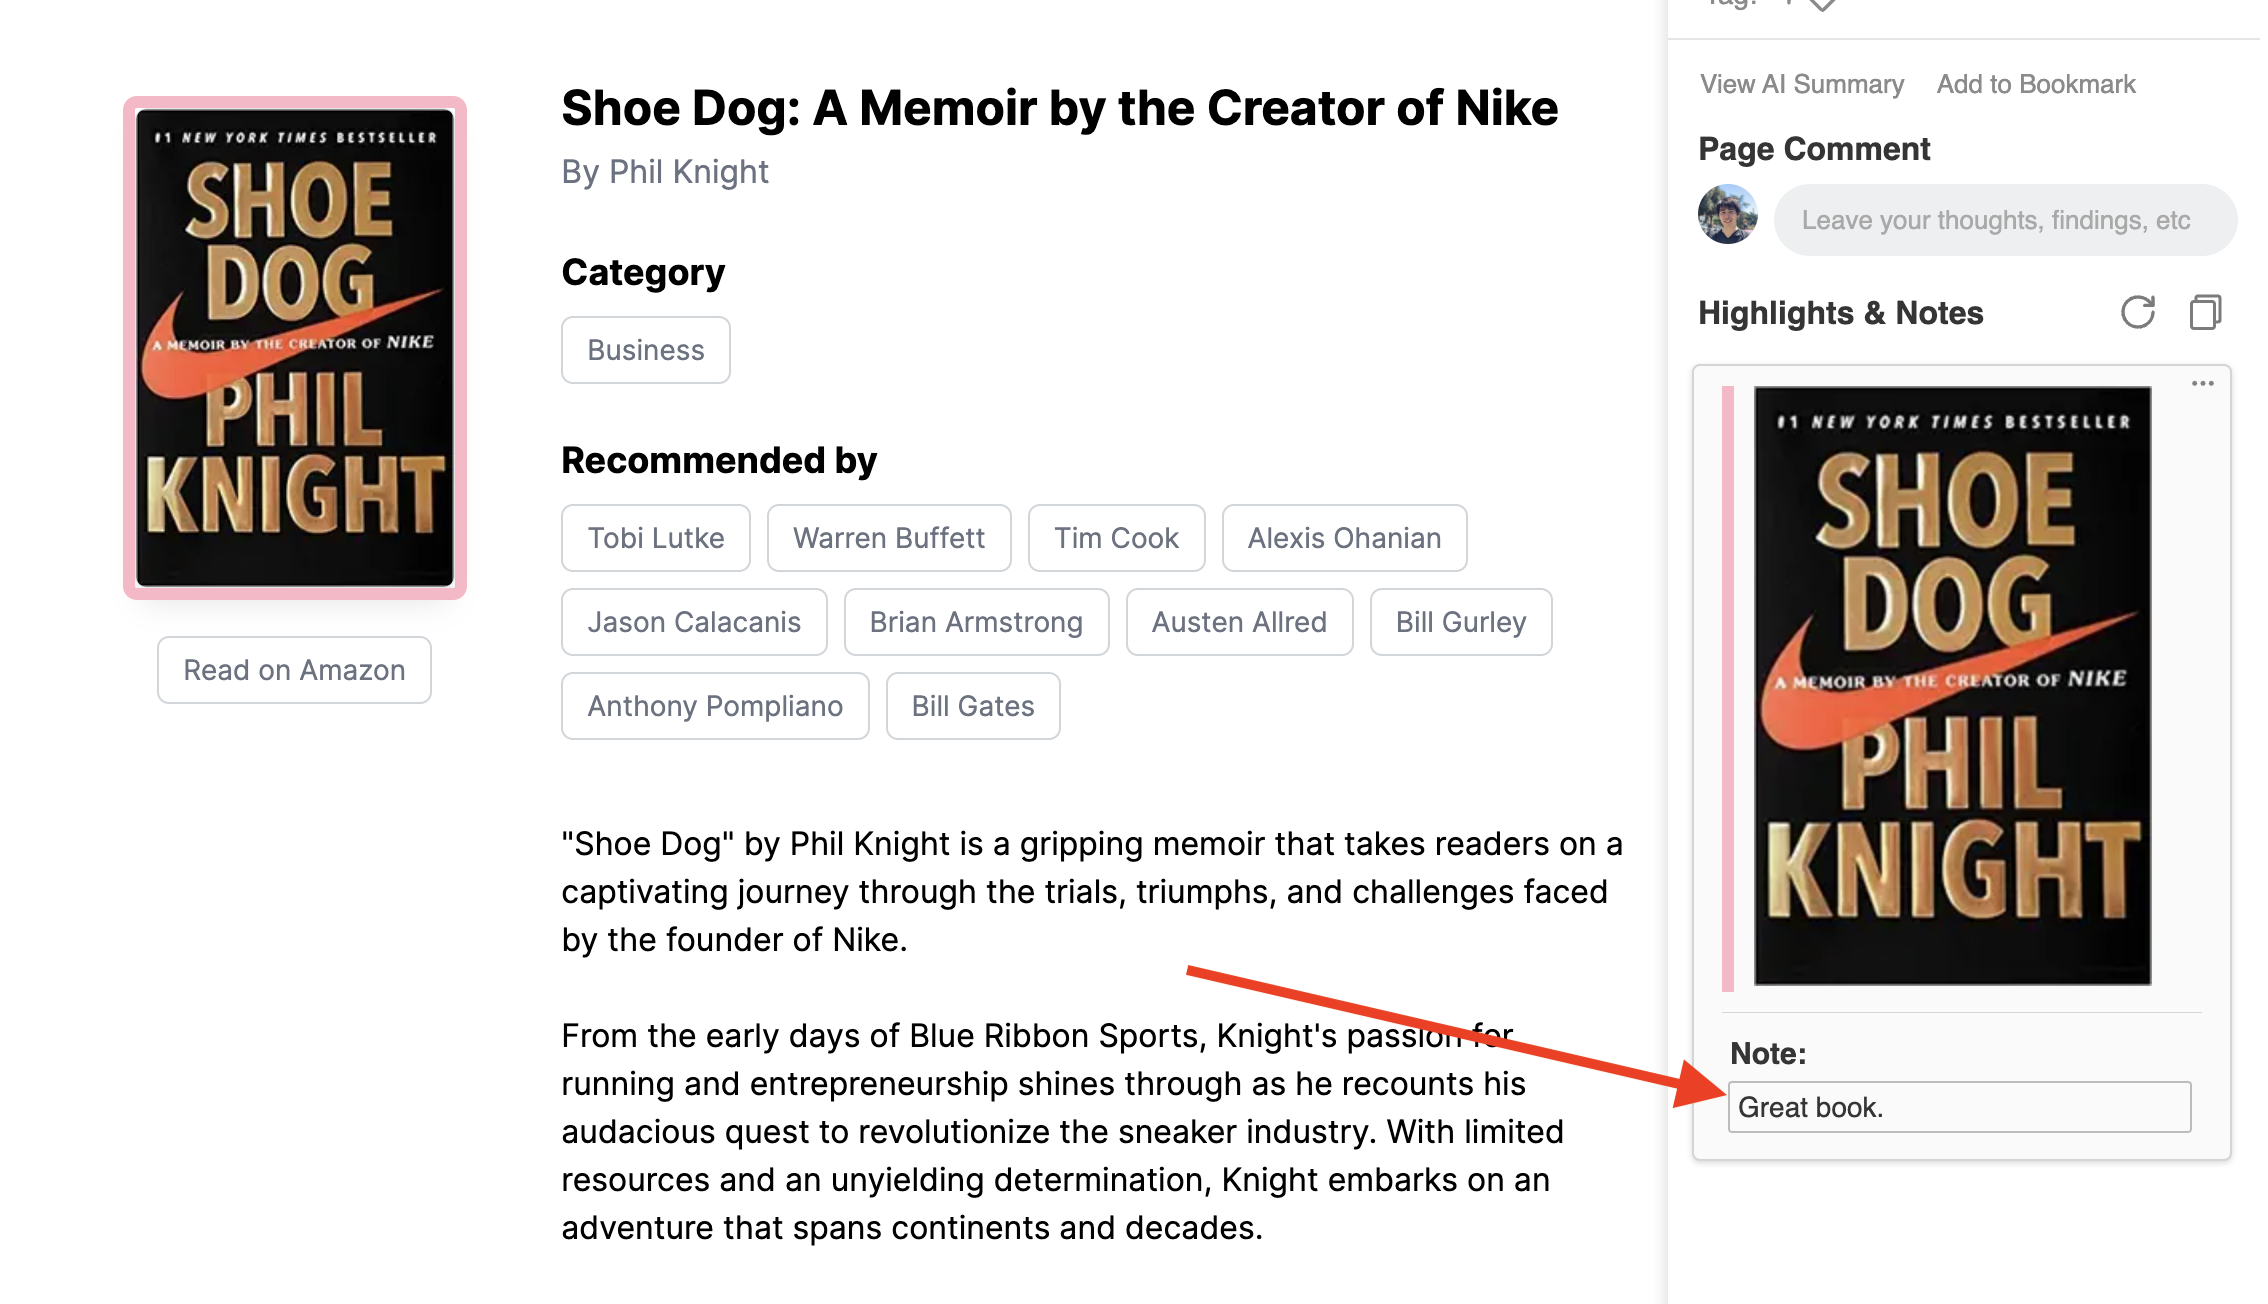
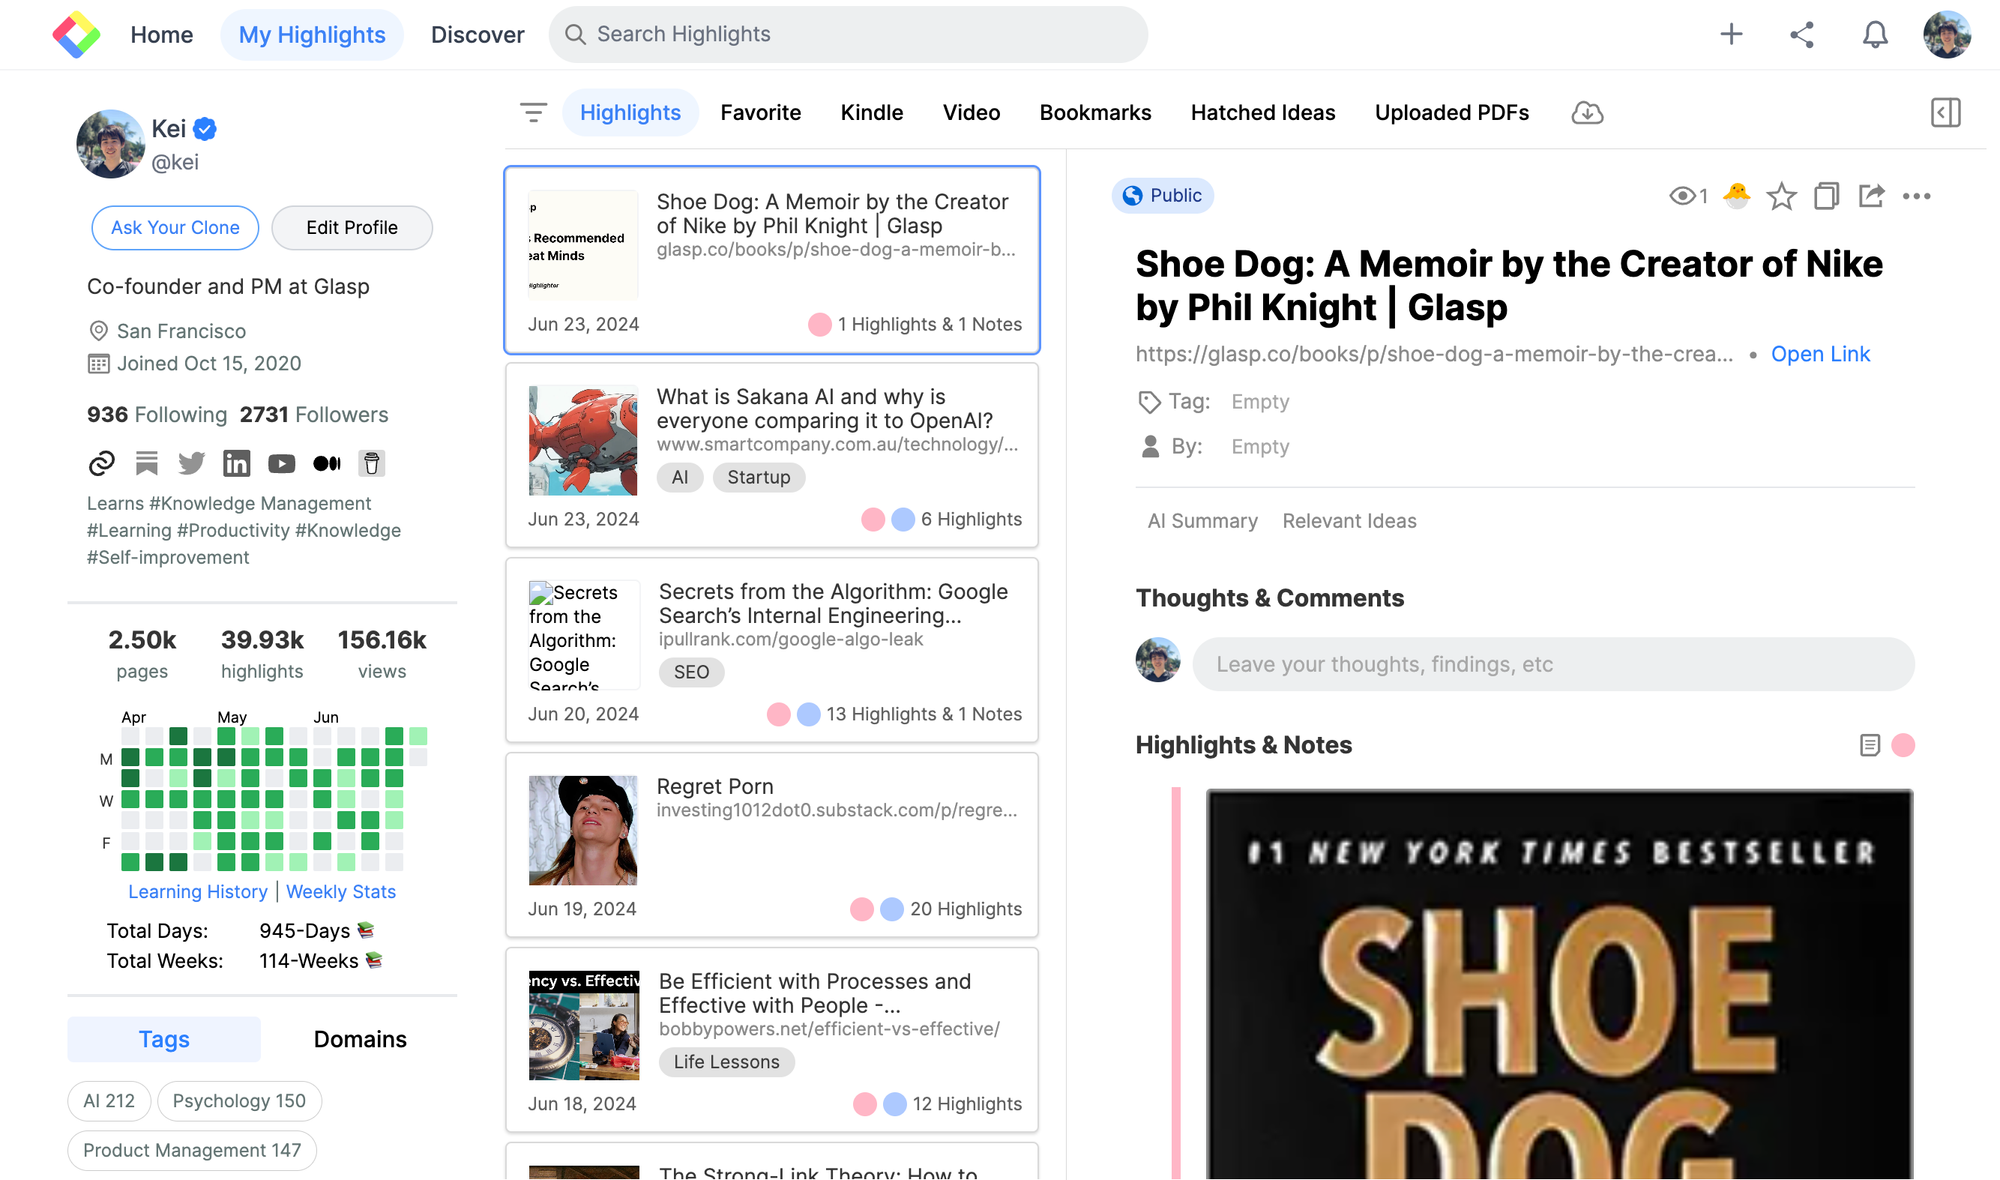
To see the saved images on the My Highlights page, click your profile icon at the top of the sidebar. It takes you to the My Highlights page.
You can see the saved images on the My Highlights page.
(Optional) Step 3: Delete an Image Highlight
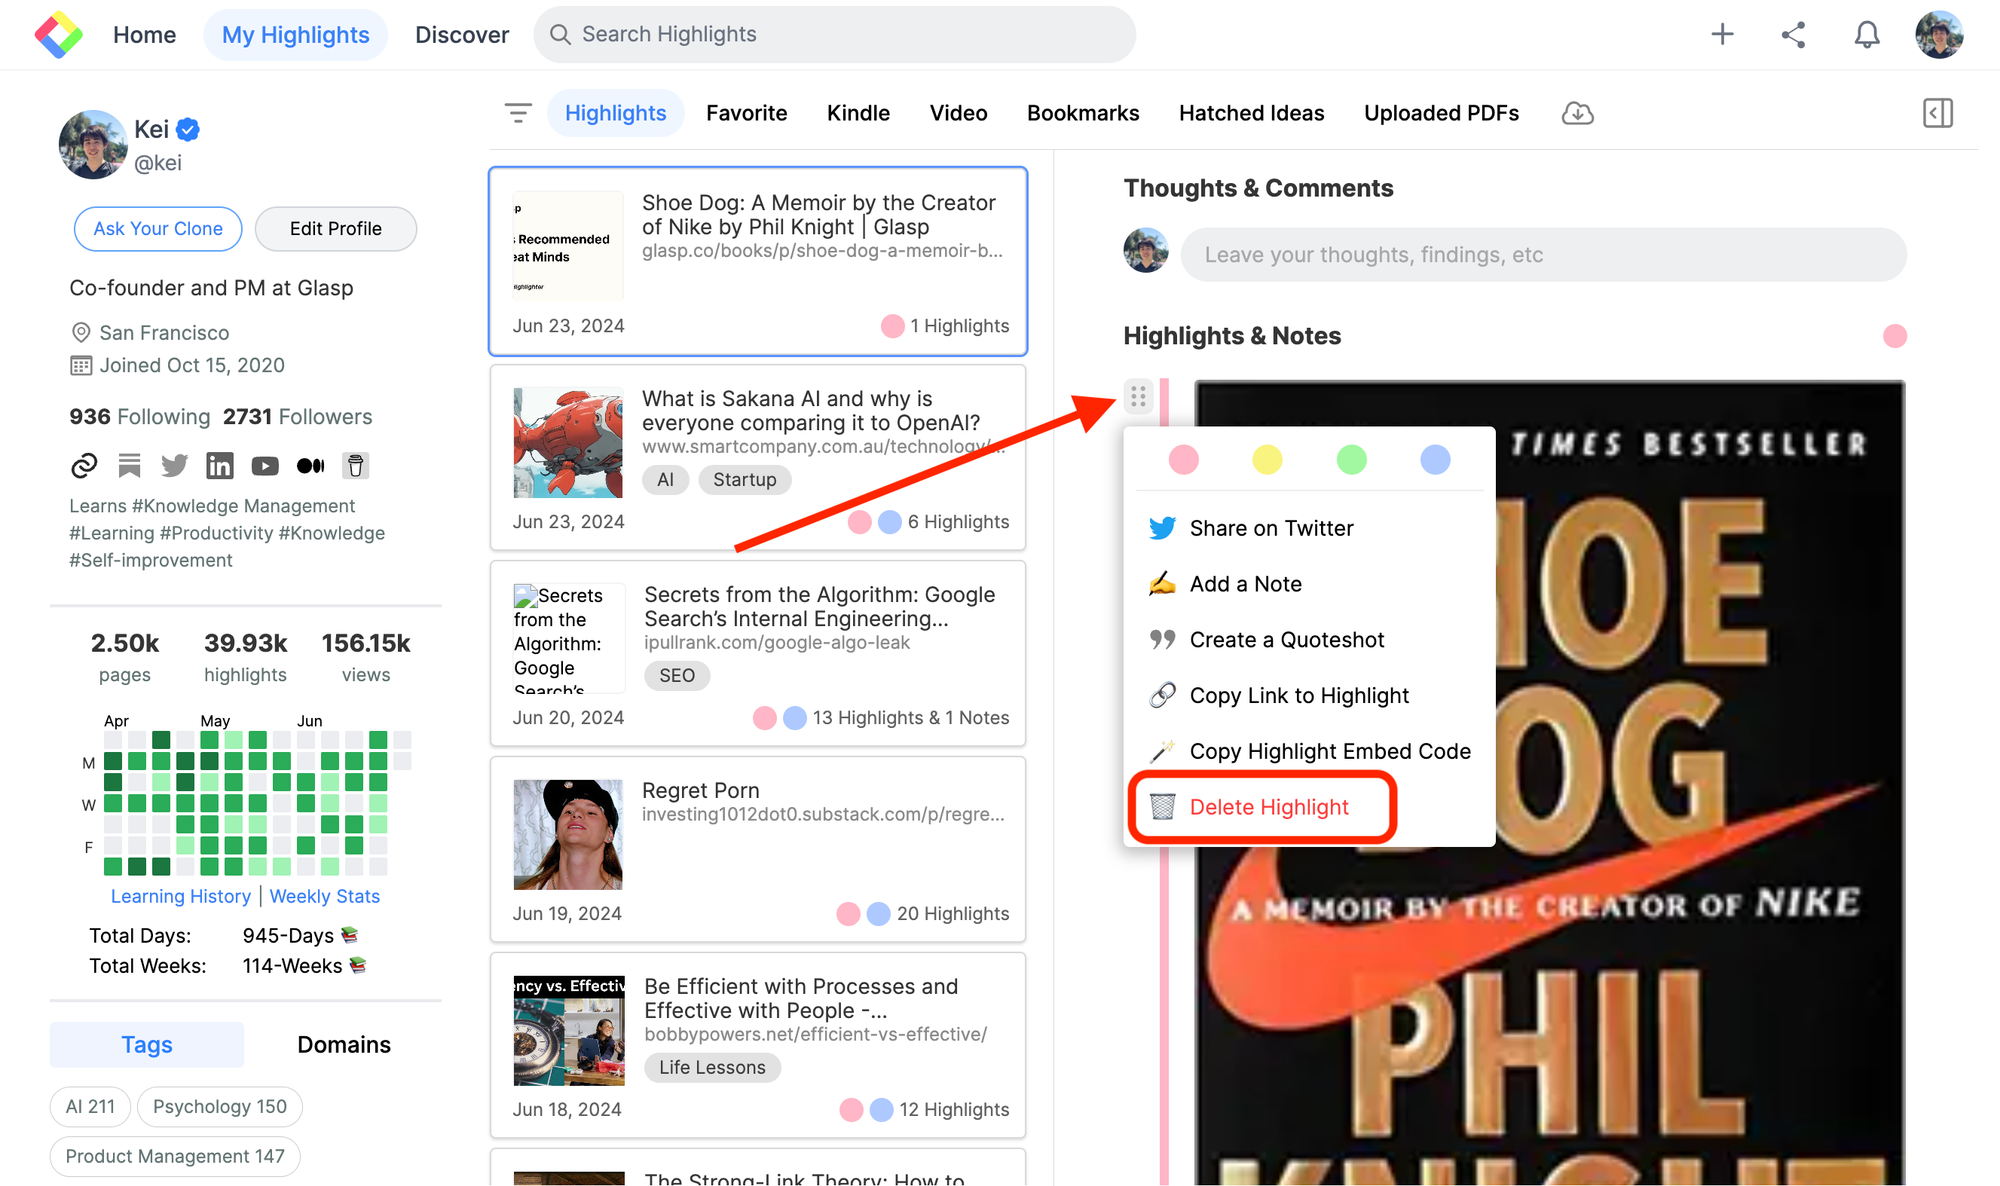
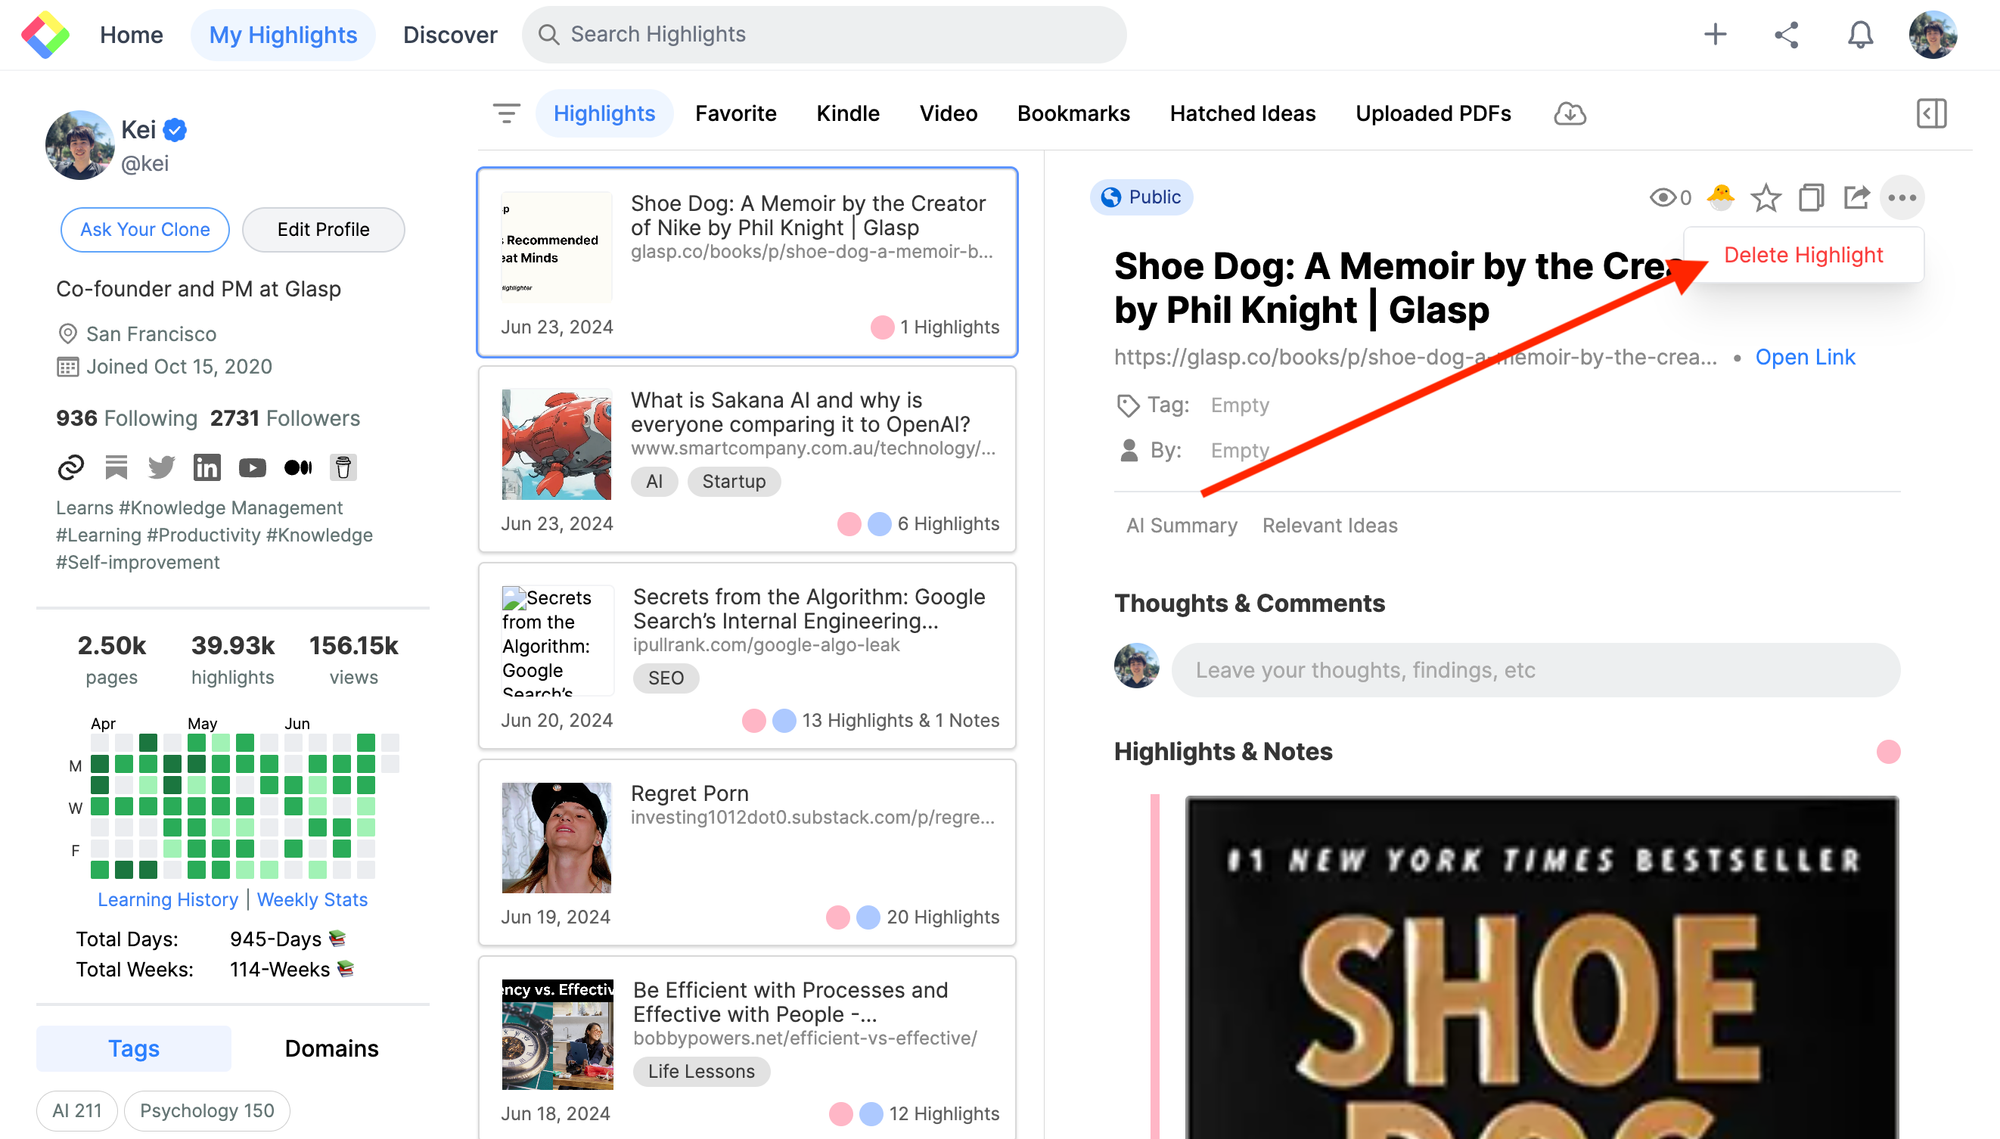
If you want to delete the image highlight, go to the My Highlights page. Select the image you want to delete, then click the six dots button. It shows a modal, so click Delete Highlight.
(Optional) Step 4: Delete the Whole Highlights
If you want to delete all the image and text highlights, click the three dots button at the top right. It shows a Delete Highlight popup, so click it.
Before you leave
If you have any questions, please look at the FAQ or message us.
👉 FAQs
👉 Slack
See you next time,
Glasp team
—
